STM32 printf function
Oct 13, 2025
In C programming, we use the standard printf function to print information to the console. This function requires including the stdint.h file to your project and nothing else. However, for microcontrollers, we need additional tools to send the message to the computer and display it on the screen. Fortunately, in modern STM32 microcontrollers, a Serial Wire Output (SWO) pin allows printing messages in STM32CubeIDE with minimum effort. I will show how to implement the STM32 printf function using SWV in STM32 microcontrollers.
1. Make sure that your board supports SWV.
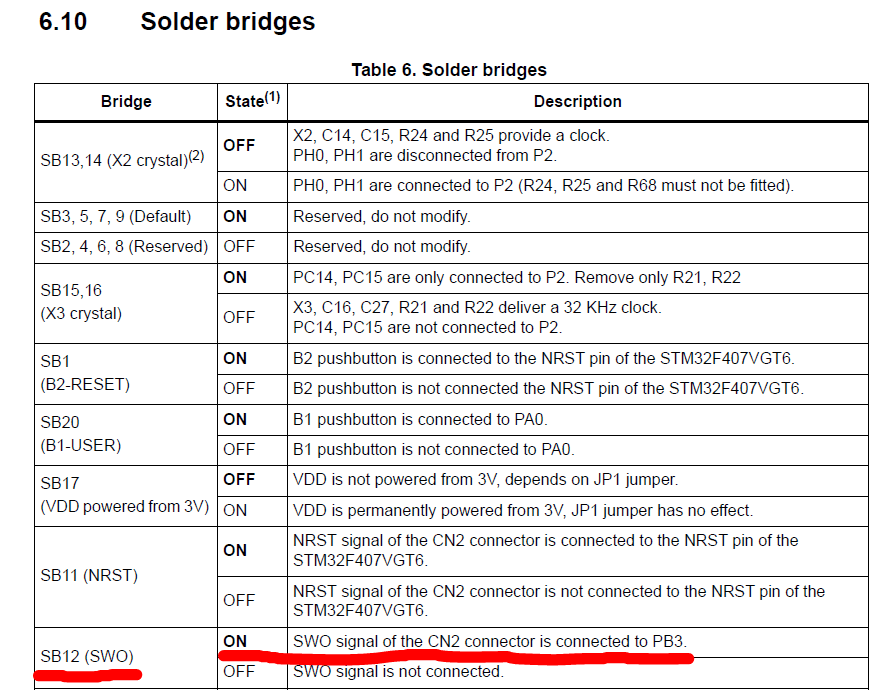
Check the user manual of your board. Make sure that it has an SWO line and that this line is connected to ST-LINK. There might be some bridge that requires soldering. For example, as shown in the figure below, PB3 is the SWO pin, and the SB12 solder bridge has to be soldered in STM32F4 discovery boards (by default, it is soldered).
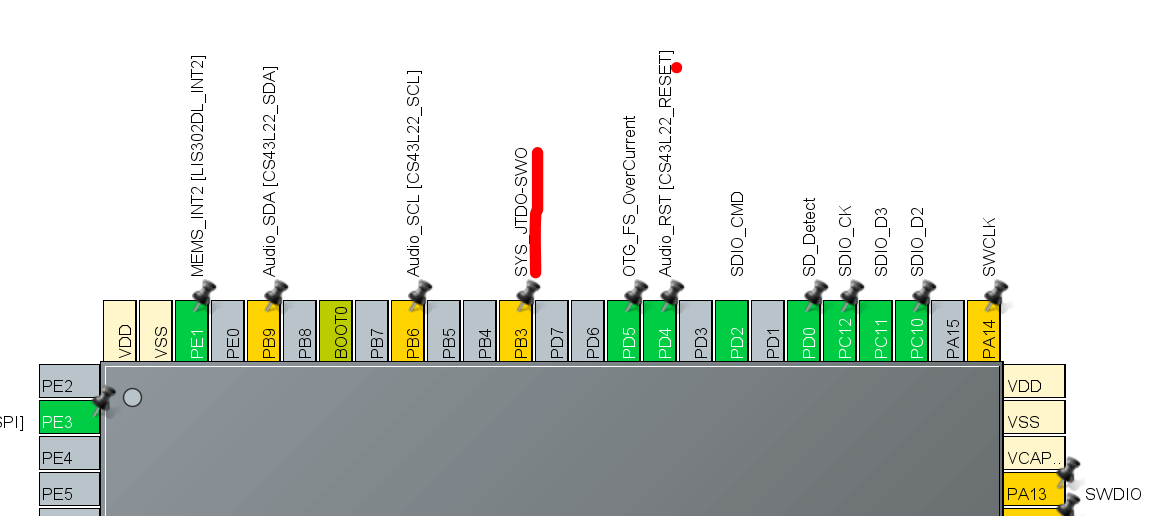
2. Make sure that the SWO pin is configured correctly. By default, a pin dedicated to SWO is configured as SWO. However, to be 100% sure, check the pin configuration in STM32CubeMX.
3. Implement the "_write" function
int _write(int le, char *ptr, int len)
{
int DataIdx;
for(DataIdx = 0; DataIdx < len; DataIdx++)
{
ITM_SendChar(*ptr++);
}
return len;
}
You can copy and insert all these lines within the main.c.
4. To test STM32 printf, let’s write this code within an infinite (while(1)) loop:
printf("Hello World \n");
HAL_Delay(1000);
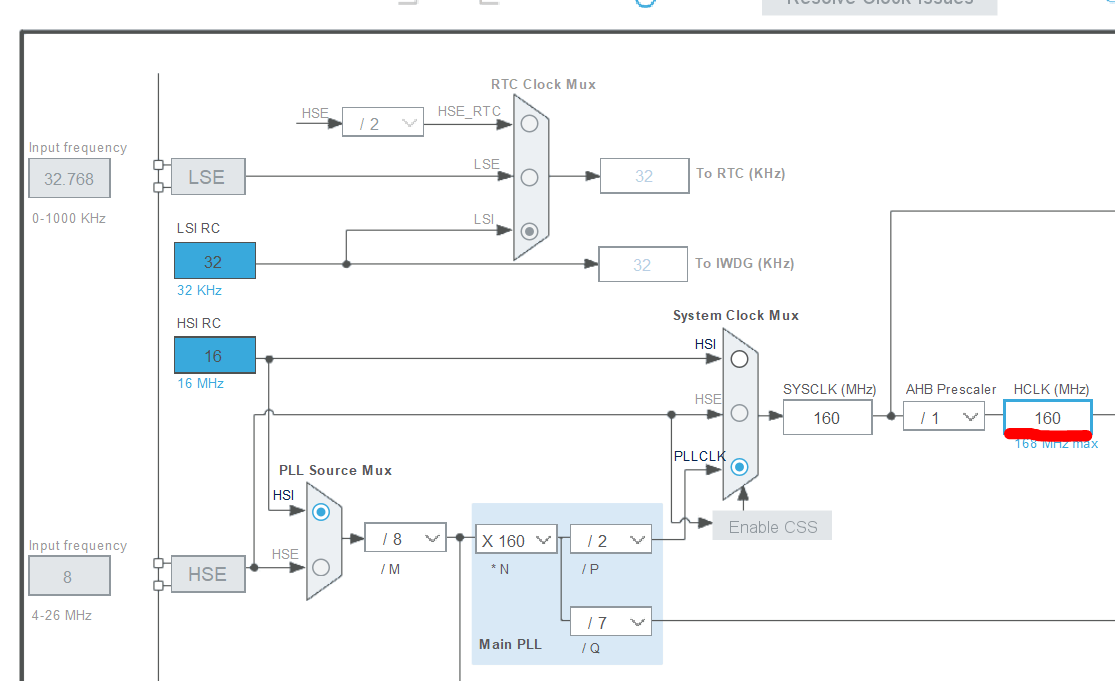
5. Next step is to enable SWV. Within Debug configuration -> Debugger, enable SWV and set a proper Core Clock frequency.
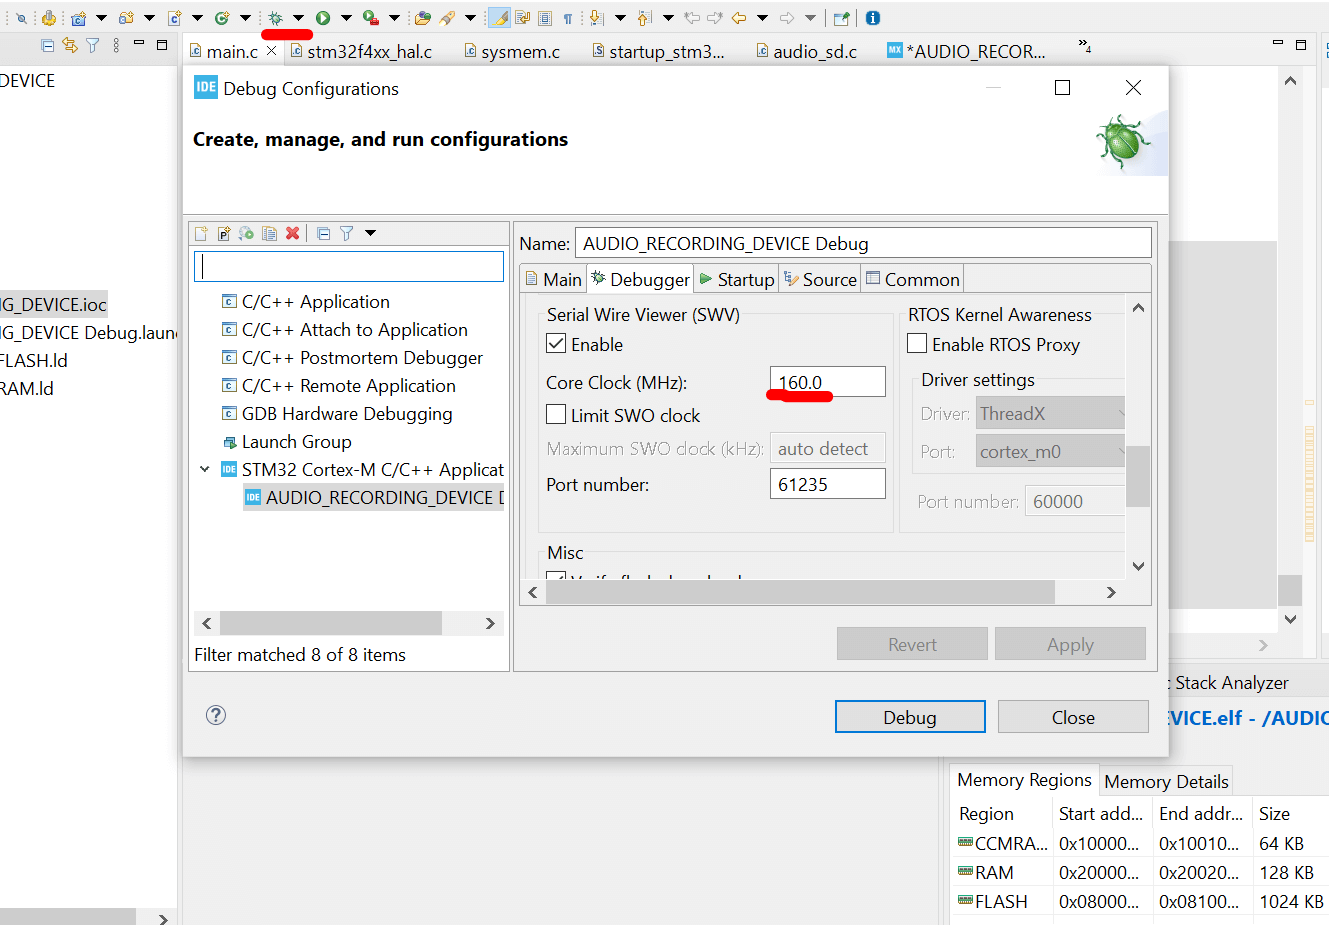
Again, you can get the core clock information from the IOC file under the Clock configuration.
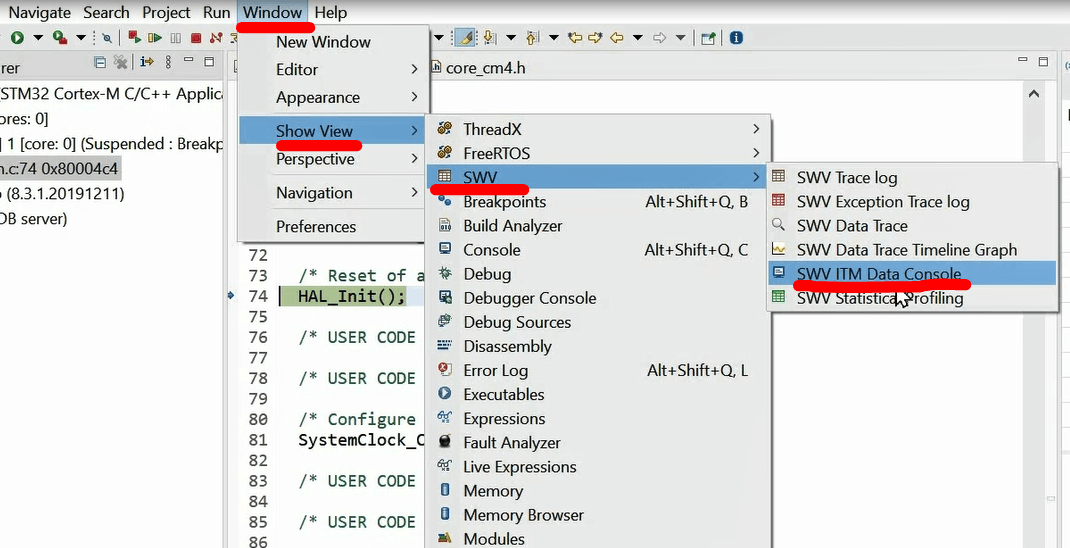
6. Finally, we can debug the project. Then we need to open the SWV ITM data console under Window -> SWV.
Next, press "configure" and enable port 0, as shown in Figure.
6. Then Start "trace" by pressing a red circle. Then we can resume the code.

If you do all the steps correctly, you have to get a hello world message on the console every 1 sec:

If you need more detailed guidance, please refer to this video: